Monday, October 1, 2012

Destroy the Icon: Part 2

Here are the scanograms I tried to upload before. I decided to use these objects, a blanket of white faux fur for comfort, a hand-made leather journal for memories, and gemstones I have mined for that extra bit of magic. :3


First I added a lightly colored layer of cool colors. I wanted to stray away from the black and white this time. I used the plain fur scan, rotated it around, and used it to bring out some texture in the colors. I also downloaded a feather brush since I couldn't find good feathers to scan.


Here, I used the other scan, rotated it around, and made it look like the cover of the book was only slightly askew from the image. I added another layer of the center design of the book, the circular element, to try and create a "halo" for the kissing figures.


On this image I was trying to position the "halo" element before dimming it. I started cutting rectangular pieces from different copied layers of the photograph as well as shifting other rectangles around.

These last three layers were of me flattening the image and adjusting the levels with an image adjustment layer until I got what I thought I wanted.


Finished!

Destroy the Icon 1


I loved the movement of the figures circling around each other. I also found that they fit together if put back to back like the continents, so I tried masking the figures and playing with putting them together in different ways. I found that the nurse figure framed the side so well that I wanted to have another copy to have them frame the piece. I used the clone stamp and blending tools to complete the figures when I cut them out.


Later on, I decided to make a tarot-like card using the theme of "The Lovers." To do this, I decided to make the nurses angels using owl wings. I masked one of the wings and desaturated the color out of it to match the black-and-white feel.


I found some random shots of Times Square during the 1940's (the time which "VJ Kiss" was taken- the photo I'm using for this project). I wanted to have a frame like the back and front of most tarot cards do.


Of course I want the actual kiss to be the center of attention, but I still have to "deconstruct" the image itself. I wanted to use a subtle sihouette of the figures using the layers blending options- dissolve.

The end. :3

Wednesday, September 19, 2012

Destroying the Icon

Our next project is in photoshop, thank goodness. x.x We're supposed to "destroy an iconic image," so I chose the ones below.


I'm afraid the first one isn't well-known enough, so I decided to play with it instead of working on the "V-J Kiss" for now before the final project.
------------------
Playing with filters...


I also made a couple of custom brushes for textures from the same image. Here's one of the few I made (the original image before "define brush preset" action).

Using images as brushes can create the coolest brushes. Just ask Alex Riuz, one of my favorite artists. :3
This is the thing I came up with, just for funsies. Process to come later.

Just some brainstorming and playing for the project to come. :)

Wednesday, September 12, 2012

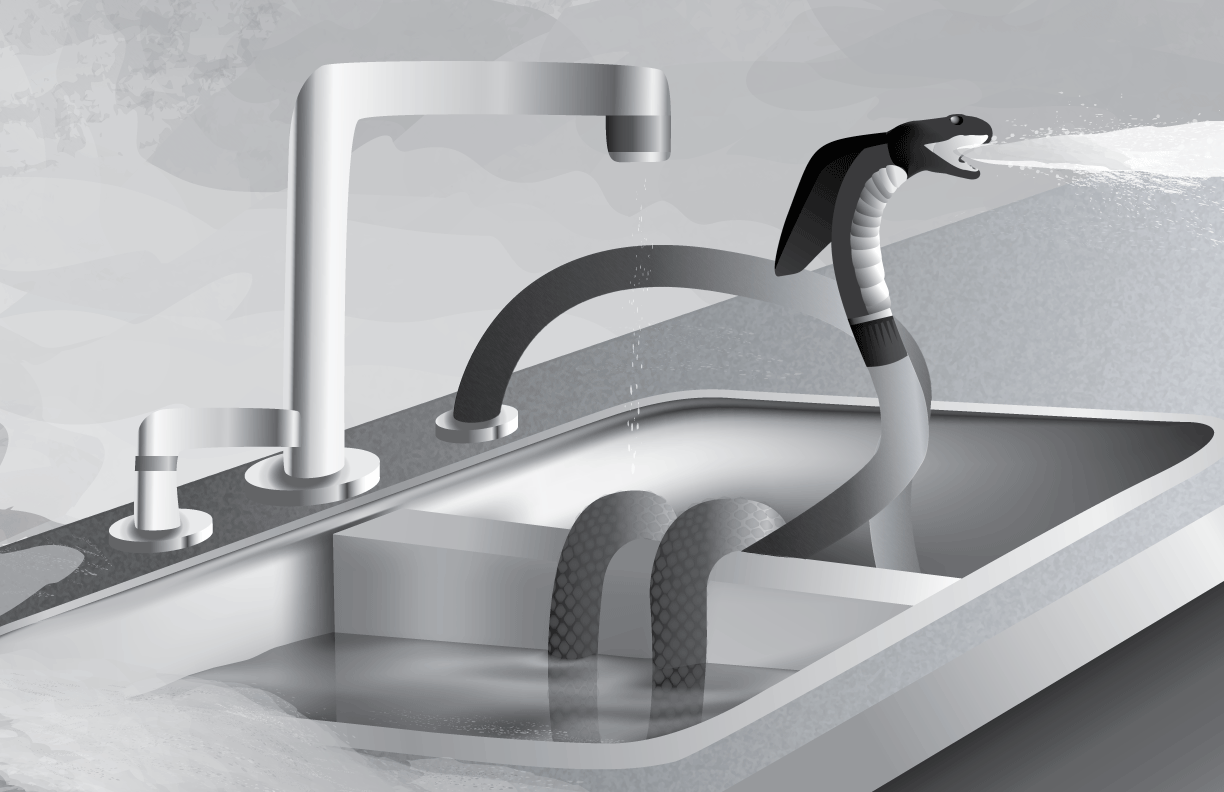
Sink Spitter Final

I'm posting the final updates here, but I still feel like there's something missing... I'm presenting it in class on average paper so I can save my money printing another one out. The only thing is, I want to start headlong into these next projects that are in PhotoShop because I have a brand new tablet! An INTOUS 5. YEA-UH!!!


-Moved head over
-Made handle
-Divided sections of faucet and handle to make it "turn"
-Finished counter edge


-Darkened head by layering semi-transparent head pieces together... I'm not sure why it wouldn't let me make it opaque again- this step alone took me around 30 minutes...


These last few are the finals. The sand looked better before, but it just made the file WAYYYY too huge.


-Added granite countertop and texture to background.


Done! (I think?) I'm not sure I like the sand on the back. That will probably be the next thing I fix.

Monday, September 10, 2012

Sink Spitter Updates

Sorry these updates have been very slow and jittered. Wait until we get into photoshop! I'm used to documenting progress in photoshop with friends. :3


I finished fitting the scales on the first two segments of snake. I tried to get them to flow with the contours of the round belly and to keep it looking like mesh on a hose. I also filled in the sink with the mesh tool.


Filled in head with mesh tool. CURSES THAT MESH TOOL.


Mr. Teach advised me to try and make the head higher to add in more visual contrast. Still not sure if I want to or not. Just previewing it here. Unfortunately... for some reason I can't get the opacity back to normal... I'll have to fix that somehow. x.x


Here I'm adding the "spit/spray" using the artistic brushes together and varying opacity and shades of white/gray. I had a giant pallette of brushes loaded to test them out from the chalk artistic brush folder to grunge and watercolor.


This piece of crap is a preview of the sand I'm working on in the foreground. I wanted to make a dish rack but that's going to take too long for the detail I want so I'm putting some sand on the counter hopefully to get that "desert" look in the background. This is made ALL in artistic brush, the splattery-dot one. All of this added about 100mb to the file. x.x I wanted to do the "create outlines" thing like you can do for fonts to make things run faster, but for some reason it won't let me...
I'll figure it out. :)

Wednesday, September 5, 2012

I Hate Oasises Now.

For the background, it was suggested I have an open desert to have the cobra in it's natural "habitat" and whatnot. Here are a couple attempts at making sand...


I knew that since my illustrator skill is pretty darn awful, I entertained the thought of livetracing the foilage and cutting out some shapes produced to make it look more simplistic like the rest of the piece. It didn't really work since palm trees are so textured...


In updates towards the main piece, I decided to make the spitting head more cobra-like and the hood more like a hose. Also, the scales/hose texture can only be placed one shape at a time. Using it as a pattern did not work... :/

Mid screenshots and more descriptions to add later.